This tutorial may be a little belated for this Christmas season but is it ever too early to get some inspiration for next year?
The husband and I moved into a smaller loft apartment in September and as Christmas approached we faced the reality that we had no space for a real Christmas tree. Don't get me wrong, I adore the smell of fresh pine but it just wasn't practical for us this year. As we debated and considered our options, we finally let go of our losses and got creative with our small space.
As much as I love real Christmas trees, I absolutely fell in love with our wall tree. It's still up and I don't want to take it down...like ever. It lights up our home. It's cozy. It's pretty. It adds sparkle. I just love it. I don't know how I'm going to part with it. Our wall will be so bare and lonely without it. Who knew I'd get so attached? Our little wall Christmas tree might just be a yearly tradition even if that means two trees - one real and one wall. That is, once we have the space for both!
Most supplies you should have laying around the house. If you don't have scrap wood, do like I do, scavenge the scrap wood section at Home Depot. I liked the knots in the wood so I picked extra knotty pieces. The husband probably didn't love that decision because it made drilling harder. He's a champ!
Use painter's tape to approximate the size of each wood piece and the spacing you'd like. This isn't an exact science. You can visually approximate, or if you're type A like me and the husband, you can measure each piece exactly. The fallen piece of tape on the ground, the huge gaping space, and the sloping line do not properly indicate our perfectionist tendencies but I guess we all fall short.
We didn't have the tools necessary to do the cutting ourselves so the nice gentleman at Home Depot helped us cut our pieces to the measurements we wanted.
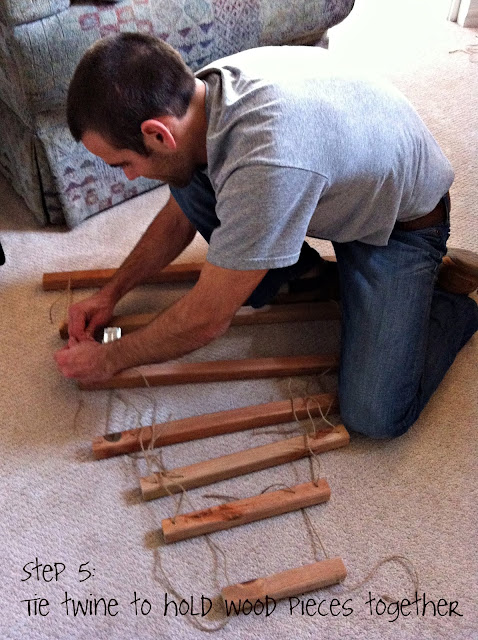
The husband tackled the drilling which turned out to be a bigger task than expected. Each piece of wood gets drilled four times -- two holes on each side. The picture below will give you a better visual. The holes on the wood pieces need to be lined up with the wood piece directly above and below to guarantee level hanging. While the husband drilled, I cut pieces of twine (and took pictures). I know, I had it easy on this project!
Just because all the pictures are of the husband does not mean I didn't participate... I swear! I worked hard... he just worked harder.
Most of our walls are concrete and therefore almost impossible to drill into so our sweet little tree is balanced on one screw.
Aww, yay. Pretty lights! My favorite part.
Once the tree was up, it was finally time to decorate it. After nailing in a ton of little nails to each wood piece, we hung the ornaments and stockings. Our normal tree topper is a beautiful gold angel but there was no way we could get that to work so I used the resources of our front lawn. A few twigs later, I had a glorious star to finish off our tree. So there you have it, ten steps to a creative Christmas tree. Hope this gets you inspired for next year and Merry Belated Christmas.


1 comment:
look at you guys!! this is just freakin' adorable!!
Post a Comment